Tuesday, December 29, 2009

My Scrap Space

My Newest Craft and Scrap Space
Here are a few pics of my newly created space. I had a walk-in closet that was just holding a bunch of junk. I purged and reassigned homes for all that stuff and added my craft stuff in it's place. It is a 4 ft x 5.5ft space and it has all that I need. I used upward storage to maximize my space. Thanks for taking time to look at my space.


My Workspace - my DH put a shelf above it for storage and a LED task light. The Sterilite container holds my 8.5 x 11 card stock, my ribbon is rolled around cross stitch spools in the "tackle box" style container, I used a 5 x 7 index card holder for my cuttlebug embossing folders, my Cuttlebug, and the picture box is holding my stickers.


My Computer Armoire and my JetMax Storage.


My Cricut sits on top of my computer armoire.


My Paper Storage sits on top of the Jetmax cubes. I used a 12 x 12 Cropper Hopper storage for the full and half sheets and 2 sterilite 3-drawer containers for scraps.

Top drawer holds my clear unmounted stamps and stamp pads. It also has all my extra scrapbook adhesive.

Middle drawer holds my pens, hole punches, and misc tools.

Bottom drawer holds my personal trimmer, Martha Stewart glitter, Cricut tool kit (under my trimmer), and misc tools.


Middle Cube was originally a paper cube with the dividers. I kept one in place and used my Creative Memories paper dividers to store my patterned paper. I have a sterilite container with my 8x8 DCWV paper packs, and misc magazines, paper, etc.. to the side.

The Bottom cube is a paper cube but I use it to keep other things organized. It holds my 12" trimmers, cricut 12x12 mats, Martha Stewart Score Board, extra pages for my current album and another album with pages.


Monday, December 14, 2009

Diaper Pouch Fold Bag

I made these containers for stocking stuffers for my co-workers.
I used the Diaper Pouch Fold from SplitCoastStampers website.
I used diecuts of gingerbread childrens decorated with
Martha Stewart glitter.


Wednesday, December 9, 2009

Our 2009 Christmas Card

I made a simple card this year. I used the Christmas tree from Christmas Cheer, cotton for the snow and a gold star brad for the tree topper.


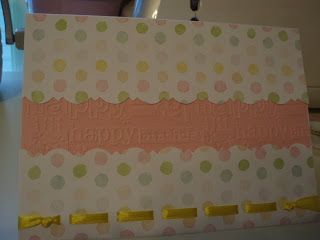
My 1st Tri-Fold Card

I have to admit this was not an easy card for me to make.
I had a few bumps along the way but in the end I think it
turned out pretty. I used the Happy Birthday Cuttlebug
folder on the pink pieces and added some paper flowers
for that little extra something.


Male Birthday Card

So I know it has been a while since I posted. So here is a card that I made for a friend of my Husband. Male cards are very hard for me to do but I like the way this one turned out.


Monday, November 2, 2009

My Co-Worker Turned 40.....

My Co-Worker turned 40 today. I made her a card and a lollipop basket.
She is a HUGE Pluto fan so that made the card easy to come up with.
The basket was something that I came up with a little at a time.
I altered her a clock but forgot to take a picture.


Cartridges used: Mickey and Friends for Pluto
Paper Pups for "Happy Birthday"
Scrap paper for the background.
Inside: Have a Dog-on Good One.


Cartridges used: Doodletype
$1 Tree basket, left over ribbon and lollipops.
She loved it.....

Saturday, October 10, 2009

Recent Cards...

Here are a couple recent cards that I created for a few birthdays in the family last week.


Friday, July 17, 2009

Mickey Mouse Clubhouse Party - 4th bday party

Our daughter wanted a Mickey Mouse theme birthday last year. I didn't have my cricut then but we did a lot of the decorations ourselves. Here are a few things that we did.


My Mom made the cake...
I made the headbands you see on the girls heads. They are made from plain white plastic headbands I got from ACMoore (2/$1.00). Then I took the sturdy felt and cut the ears out. I made a sleeve for the headband out of fabric felt and then hand sewn on the ears. They were a big hit.

Since we had the party at the park we had to make the shelter stand out (not really but we did anyway LOL). Here is a close up of wooden characters that we painted. We projected each character onto a piece of wood. Then cut them out, painted them, put a clear coat on top, then finally mounted to a stake so that we could hammer them into the ground. We tried to get each kids' picture with the characters.


Here is the view of the shelter from a distance. I guess we did stand out. LOL


Wednesday, July 1, 2009

July 4th Door Decoration

I didn't have anything Patriotic for the 4th of July so I decided to make something. I had the container that I have been using for a while now but I repurposed it for this.
I haven't gotten the Stand and Salute cartridge yet so I had to improvise. I used the fireworks from Happily Ever After (Mulan) and stars from George. It is had to see but I used glitter paper for the the fireworks and card stock for the stars. I had 2 small flags lying around so I added them to it.


Friday, June 26, 2009

More Cards....

My husband asked me to make a Thank You card for a resident at the apt complex he works because she brought the whole staff lunch on Monday. So I thought this would be a great time to try to Joy fold card. I should have made it a bit bigger than the instructions but it was just fine.
Thank you to Beate Johns from splitcoaststampers for her tutorial. Now to try to figure the dimensions to make it a bigger card HMMM....


Here is a card that I made for my DD to give to my Dad. I got the idea from ShellyWorld from the PAF forum. **Thanks a bunch**.
I have to admit I thought that it was a bigger card than it turned out to be - those pesky cameras LOL. Anyway - my dad liked it and still has it displayed.


Saturday, June 20, 2009

Father's Day Cards

Here are just a few of the cards that I made this year for Father's Day. I created 5 so far but only took pics of 3. I hope all the Fathers in my family have a GREAT day.

First is a card that made to give to my husband. He is handy with tools and just finished building our storage shed so I thought that this would be perfect. I downloaded the cut file from Ruelysi (Thank you). But I ended up doing this from the downloaded pdf files from melstampz.blogspot.com. (Thank you too). I altered it to be a card instead of a "belt bag". I used tool diecuts left over from my CM stash. The inside says "You build the foundation to our family"

Second is a card I made for my dad for my husband and me to give him. I used the waterfall tutorial from Kathy Logan at Splitcoaststampers to create it (Thank you). It took me some time to figure it out but I did and I love the card. The background paper is DCWV and the 4 sayings are "A Father, Listens with is heart, Speaks with Hugs, Teaches by Example." Hope he likes it.


Lastly is a card that my daughter will be giving her daddy. She wanted to make him a softball themed card so we found big baseball stickers WM, I hand cut the field, mounted it to some baseball saying background paper, cut DAD from PS and that was it. Pretty simple but I think he will love it since he plays softball for a team at work. The inside says "You're a homerun hit out of the park" She is so excited to give it to him. Thank for looking at my creations.


Saturday, June 13, 2009

My daughter has a party to go to today and the little girl is a Flamingo fan. Thanks to Laurinda from the Cricut Message board for her cut file. Here are the things I made her....


I bought a cheap towel from WM and used the Freezer Paper Method to add the flamingos and her name. I used fabric paint from the WM craft dept. I didn't quite make them even but I think it turned out pretty good.


This is a 4x4 card with simple paper and the same flamingo cut except I added the wing and used a pop dot to make it stand out.

I hope her friend likes it.


Wednesday, June 10, 2009

Wonder Woman Birthday Card

My daughter had a bday party to go to and the little girl is a big Super Hero Fan. I didn't know how to make a Spiderman or Batman so I found a Wonder Woman made karen-p from the cricut.com PDDU forum and used that as inspiration for a Girl Super Hero Card.


Wanted to Share...

It has been such a pleasure for me to be able to download CDS files from others that I wanted to add one for everyone to download from me. So here is the cut file for my banner flags that I created for my daughter's birthday banner. I used GBS for it. You can get 2 flags from one sheet of 12x12 paper. I hope everyone enjoys it.
Here is the link to my file :
Here is a screen shot of what it looks like.

Tuesday, June 2, 2009

More Decorations from my Daughter's Party

I created these with the HEA and DCT cartridges. They are cut at 4.5" - 5". I used them to hag from the top of the canopy. They were laminated so that the humidity didn't wrinkle them.


Tuesday, May 26, 2009

Daughter's Birthday Party

This year our Daughter turned 5 so we of course had a big party. She wanted a Princess Party but she also wanted to include the boys so the theme ended up being Knights & Princesses. I made the invitations on my computer using a Medieval Font. I had to be frugal so we made a lot of the deocorations. We bought the Fisher Price inflatable bouncer on sale for a little more than it would have been to rent one. My mom made her cake and we used things that we had around the house for the kids to play with. They had a GREAT time.

Our daughter's costume for her party.

We wanted the boys to be able to "slay" the dragon so we used the Dragon from the Cricut Paper Dolls Dress Up cartridge. I used my markers and "cut" it on regular copy paper then projected it onto a piece of 1/4" plywood, then painted it the colors my daughter chose, we staked it in the yard. The boys had a FUN time slaying the dragon - they even broke the wood.
Since my Mom has made cakes since I was little she has of course made all of my daughters cakes. This year she made the castle cake. Everyone gasped over it.


I made the banner for her party using CDS to make the banner flags and added the Disney Princesses from Happily Ever After and Dreams Come True Cartridges. I also added the "extras" to fill up the empty space on the banners with the letters that spelled out HAPPY 5th BIRTHDAY.


Miscellaneous Cards

OK - I have found that a daily blogger I am not. But when I do add a post I add a lot at once. So here we go.
My daughter's classroom had a lot of birthdays in May (including her's). I knew that buyig aard and a gift for each one would have killed the purse strings. So I found inexpensive gifts and made the cards from things I had around the craft room.
Here are a few of the cards....


Monday, April 6, 2009

New Card

My daughter got invited to a birthday party for one of her friends. We wanted to make her a special card. The invitation was Ariel so we thought that it would be a perfect fit to do an Ariel card. Inside I wrote - "Have a Swimmingly Fun Birthday".


Saturday, February 21, 2009

I'm Back

Seems like forever that I have posted on my blog. I gave myself some time off since the January Card a Day Challenge. Took a long weekend trip to Florida, and of course Valentine's Day has come and gone. I have only worked on a couple of things so far this month but will start full swing again next month - as I will be making a lot of things for my daughter's 5th birthday. Wish me luck.

Here is a card that I made for a good friend of mine. It was made from DCWV Color Block Prints paper and Random flowers that I rec'd from a RAK. I used a stencil for the lettering.


Here is the treat bag we made for my daughter's Pre-K class. I used Jen Balcer's (?) tutorial on Split Coast Stampers to create the bag (2-5-7-10) and used my Cricut to cut 24 hearts using the Quantity Button (what a great function).


Saturday, January 31, 2009

Challenge Card #31

Card #31
I did it 31 cards in 31 days. This card was inspired by the ribbon I found at a local pottery store. I stamped black dots on red card stock, added the ribbon to outside. The inside I stamped red dots and drew my own lady bugs on the red background. I came up with the saying/poem for the card.

This challenge was GREAT. I have made a lot of my family cards for the year but I still have a lot more to go. I want to thank Jennifer Wuthrich for the challenge and for getting me going.

Thanks for sharing this experience with me.